SARMAD cluster

How to use SARMAD cluster

First, In this tutorial we will show you how to login to SARMAD cluster account through SSH using PuTTY and then learn how to use WinSCP to transfer files from and to your account via SSH. This tutorial will teach you everything you need to know to transfer files

How to Login?

Overview

PuTTY is a free software application for Windows XP, Vista, 7 and 8 which can be used to make an SSH connection to your server. You can download the application at http://www.chiark.greenend.org.uk/~sgtatham/putty/download.html.

Requirements

Before you start, youl'll need:

  • Your SSH login credentials.
  • Be familiar with connecting to your server via SSH.

Instructions

  1. Download PuTTY from http://www.chiark.greenend.org.uk/~sgtatham/putty/ or another PuTTY download source. The "putty.exe" download is good for basic SSH.
  2. Save the download to your C:\ or etc. drive folder.
  3. If you want to make a link to PuTTY on your desktop:
    • Open the C:\ or saved files folder in Windows Explorer.
    • Right click on the putty.exe file and select Send To > Desktop
  4. Double-click on the putty.exe program or the desktop shortcut to launch the application.

    Putty icon.png

  5. Enter your connection settings:

    Putty settings.png

    • Host Name: 192.168.220.100
    • Port: 22 (leave as default)
    • Connection Type: SSH (leave as default)
  6. Click Open to start the SSH session.
  7. If this is your first time connecting to the server from this computer, you will see the following output. Accept the connection by clicking Yes.

    Putty alert.png

  8. Once the SSH Connection is open, you should see a terminal prompt asking for your username:
    login as:

    Enter your primary account, username.

    Connect with your SSH user of choice.

  9. Next, enter your password. Please note that you will NOT see your cursor moving, or any characters typed (such as ******), when typing your password. This is a standard PuTTY security feature. Hit enter.
    Using keyboard-interactive authentication.
    Password:
  10. You are now logged into your server with SSH. You should see output like this:
    username@cluster:~$

    You can begin typing commands at the prompt.

Resources

If you are new to command-line interfaces, you may want to get familiar with some of the commands first:

How to File transfer

WinSCP Tutorial

Learn How to Use WinSCP

WinSCP (Windows Secure Copy) is an open source SecureFTP client for Windows. It allows secure file transfers between the client's local computer and the remote server. In order to establish a secure connection through WinSCP the SSH support should be enabled. Otherwise, the WinSCP software can be used as a regular FTP client.

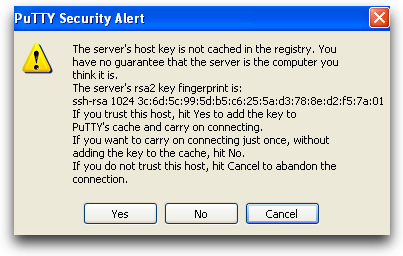
The WinSCP software uses cryptographical methods, integrated in SSH to protect your login details and private information. It prevents different types of attacks like password sniffing and malicious monitoring of the sessions between your local computer and the remote server.

The software can be downloaded from the following URL .

It requires Windows OS. The installation of WinSCP is quite simple. Basically you need to click on the Next button several times leaving the default options.

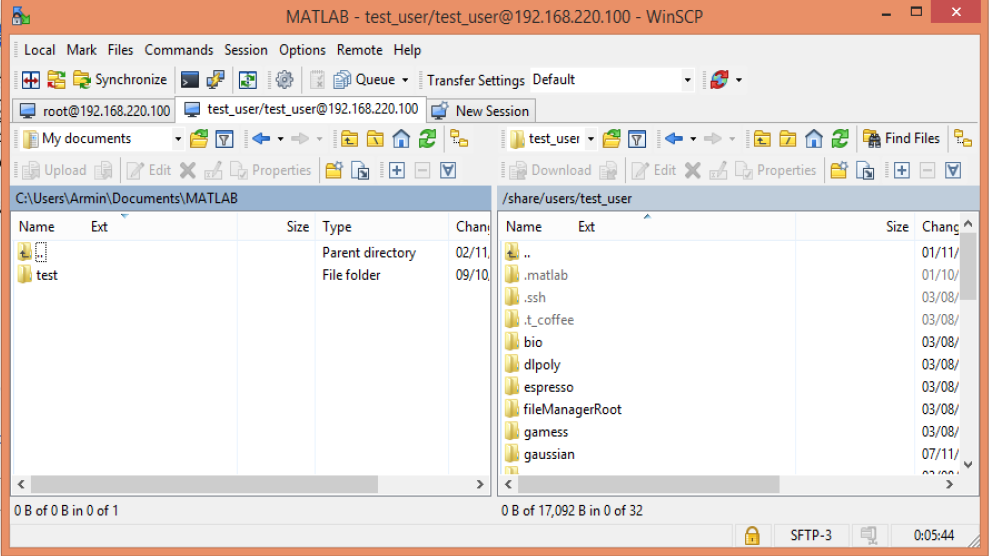
In order to customize it to your likings you can choose between the Norton-Commander interface and the Windows Explorer-like interface.


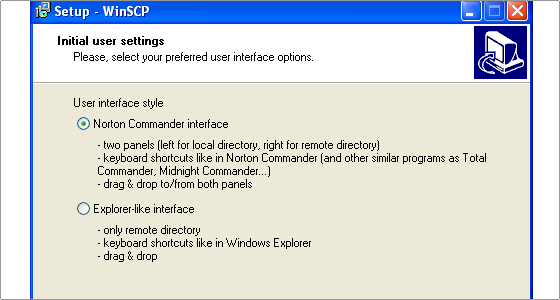
The main difference is that the first interface provides 2 panels (one with the local computer directory structure and the other with the remote) while the second shows only the remote. If you are used to work with applications like Norton Commander, Total Commander or Midnight Commander, pick the first option. If you prefer Windows Explored, go with the second.

The interfaces settings can be changed after the end of the installation too.  

Once you are ready with the installation, you can establish a secure connection from your local computer to the remote server.

Open the WinSCP client.

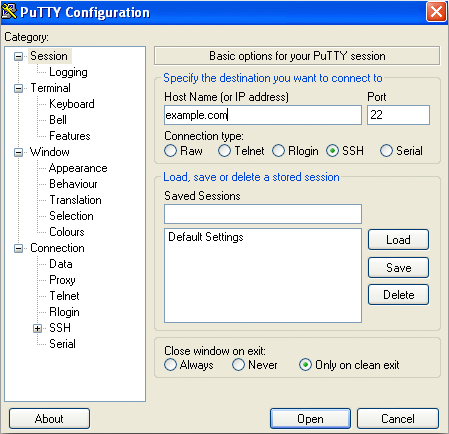
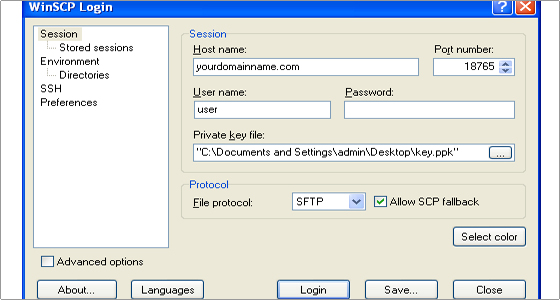
Navigate to the Session section. 

Enter the Host name(192.168.220.100), the Port number(22) and the User Name and the Password Pick the preferred protocol (SCP (Secure Copy)).


Once the session is opened, you can perform all the standard FTP actions. The difference is that the connection is secured.


You can keep your connection details by storing them in the Stored Sessions subsection.